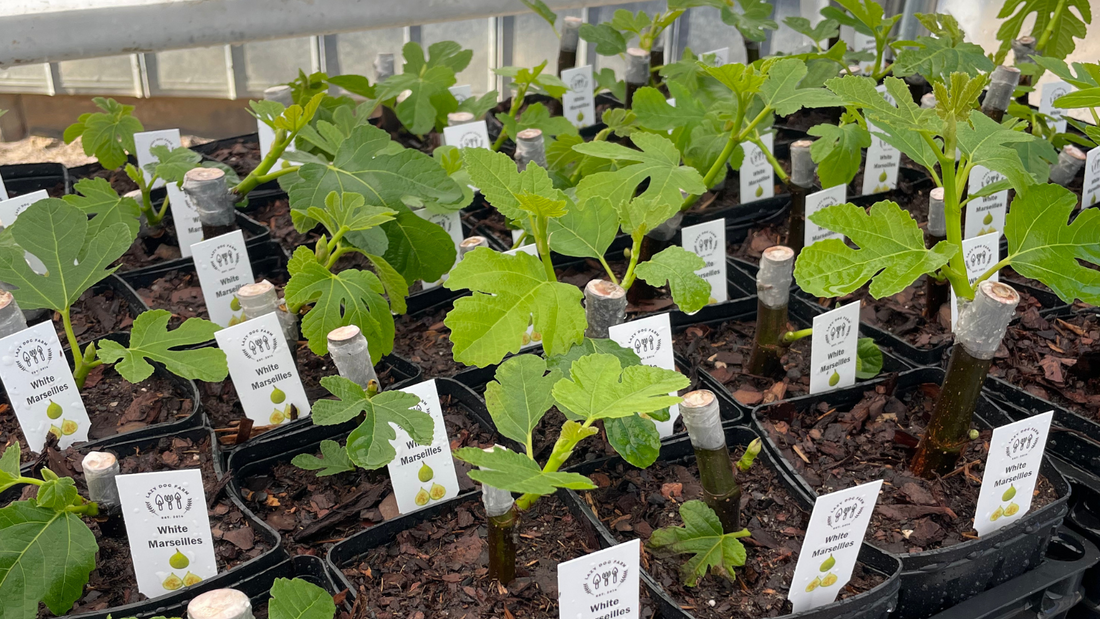
Like many fruit trees, fig trees are mostly propagated from cuttings. This process involves taking a stick or twig from an existing fig tree and planting it in some kind of soil media. When subjected to the right conditions, that stick in the dirt will soon form roots and leaves.
We've been propagating fig trees for several years and have learned a lot about the process in those few years. Our first year of fig tree propagation involved just a handful of cuttings. Then we did 100+ cuttings the following year, 500+ cuttings last year, and over 1,000 this year. Below we'll share some of the tips we've learned as we propagate more and more fig trees.
Fig Propagation Temperature
I put this one at the top of the list because it seems to be the most important. For a cutting to properly root and make a new fig tree, temperatures need to be ideal. This is not a huge concern for someone starting a few fig cuttings in their house, because room temperature is usually pretty good.
But if you're propagating fig trees in a garage or greenhouse, you'll need to make sure you have a warm environment for them. But it can't be too warm. I've lost several fig trees over the years when my greenhouse gets too hot during the winter. I have to keep a close eye on my greenhouse and raise the sides on days when the outside temperatures get in the mid to high 70s. Otherwise it gets too hot in there and will fry those baby fig trees.
However for most growers, keeping the soil warm enough is the biggest issue. Heat mats can be very useful for fig propagation. When used in conjunction with a thermostat, heat mats or propagation mats will allow you to keep the soil at a somewhat constant temperature throughout the propagation process.
Humidity domes can also be really helpful on a smaller scale. I don't use humidity domes because we have so many trays of cuttings in our greenhouse. But if I were only propagating a tray or two at the time, I would definitely utilize them as they can certainly speed up the process.
Last year we took all our fig cuttings and propagated them in November, which worked very well. But this year we decided to start taking cuttings in October when the temperatures outside were still relatively warm. This worked even better! If we can get those cuttings to root before winter temperatures arrive, they'll make a new fig tree even faster.

What Kind of Pots Should You Use?
I've seen growers root fig cuttings in every size pot imaginable. I've even seen some growers root them in plastic bags or plastic soda bottles. Feel free to get creative and be resourceful with what you have.
We start all our fig cuttings in 2.5" wide square pots that are 4" deep. These are pretty small and take a bit of finesse, but it works for our system where we're trying to grow a lot of fig trees in a small space.
If you're not limited on space, I'd recommend going with taller pots as opposed to shallow ones. These taller pots allow you to get more nodes of the fig cutting into the soil media, increasing the chances of a strong, robust root system. We really like the "tree pots" that we use for shipping our fig trees, and these are usually available in several different sizes.

Preparing Your Fig Cutting
This is the area where we've made the most changes over the last year. After taking cuttings from an in-ground fig tree, we would lightly score the bottom of the cutting 2-3 times and cut a piece of bark off the bottom of the cutting. But I've found that this isn't that necessary.
While it certainly doesn't hurt anytime to make these cuts and scores on the bottom of the cutting, I don't think it's imperative for success. If you have plenty of time, go for it. But if you're doing a lot of cuttings at once and it seems time consuming, I think you'll be fine skipping it.
The other change we made this year was how we seal the top of the cutting. This is something you definitely want to do because it keeps the cutting from drying while it's trying to root. In the past we've used wax tape (aka buddy tape), but this year we started dipping the tips in melted paraffin wax. This not only made the process faster, but it's a lot easier on your hands.

What Soil Do You Use?
Many growers will make their own soil mix using peat, coconut coir, perlite, and other ingredients. Personally, I'm a huge fan of ProMix. It works great for growing vegetable transplants and also works great for fig cuttings. I use the ProMix BX formulation because that's what I can find locally, but they make several different mixes that would work.
I like ProMix because it's what I call "dummy proof." It stays moist, but not too moist. If your fig cutting stays in a saturated environment while trying to root, it's liable to rot. ProMix makes it easy because it drains so well, but also retains moisture.
Try It Yourself!
If you're wanting to give fig propagation a try, the best thing to do would be to find someone who has a fig tree. Ask them if you can take a few cuttings and see if you can get them to root. It's probably going to take a couple years before you get really good at it, but it's a fun learning experience. Once you have this skillset conquered, you'll be able to propagate much more than just fig trees!

