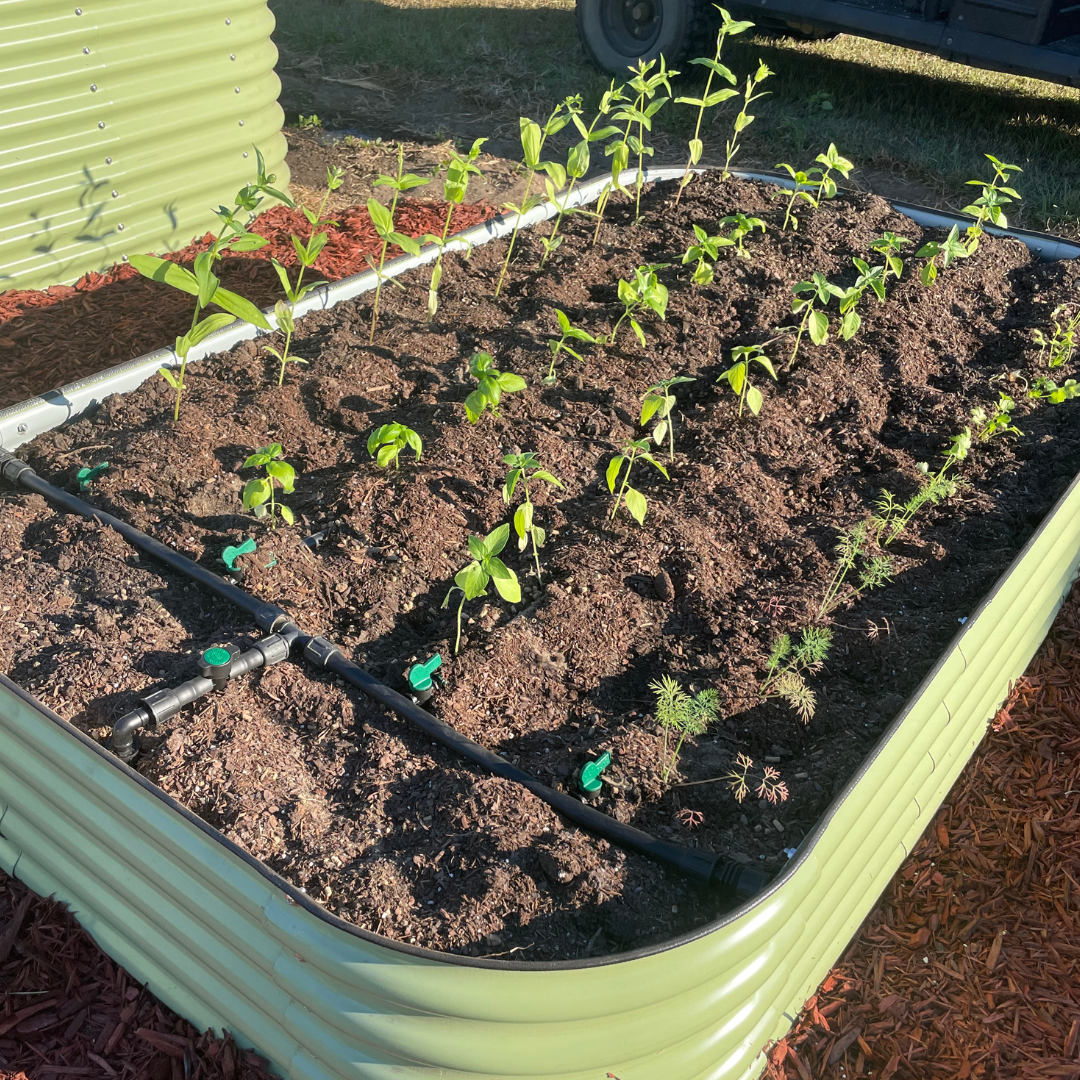
We purchased 13 raised beds from Olle Gardens online and assembled them based on the instructions provided. These raised beds are great because they are made of galvanized metal and should last a lifetime. We also like them because they can be configured in many different shapes and sizes depending your needs. If you'd like to purchase some of these, be sure to use the "LAZYDOGFARM" for a 10% discount.
We originally weren't going to install a drip irrigation system for the raised beds on the first season growing in them. But the more we talked to others who had a raised bed irrigation system, we started thinking that we should install our drip system prior to filling the beds. This way, our header lines would sit on the inside of each bed and create a neat and clean look for the plot.
Below we've outlined the entire process of installing our raised bed irrigation system. If you already have your beds filled and in place, the setup would be similar. But instead of having the mainline tubing underneath and inside the beds, you would have it on the perimeter and outside of the beds.
Installing the Mainline Between Raised Beds
Parts Needed:
• 5/8" Mainline Tubing
• Mainline Elbows
• Mainline Tees
• Mainline End Caps
• Mainline Flush Valve
Prior to setting the beds in each plot, we made a furrow in the soil where the center of each row of beds would sit. We then laid mainline tubing in the furrow for each of the four rows of raised beds. The furrow prevents the beds from cutting into the mainline tubing once the beds are set in the plot.
Next, we set the beds in their permanent position in the plot. We then used more mainline tubing and a mainline tee to create a vertical riser for each bed. We installed the mainline tee right inside the center of each raised bed and ran the vertical piece of tubing to the top of each bed.
We then connected the mainline tubing for each row of beds using mainline tees and elbows. We only connected the rows on one end of the plot. On the other end, we plugged the mainline with end caps and installed a mainline flush valve on the end of one of the mainline tubing rows. This will allow the system to automatically flush when the water is not running.

Assembling the Filter, Regulator, and Hose Hookup to Feed the System
Parts Needed:
• 3/4" Hose Thread Filter
• Senninger 3/4" Hose Thread 10 PSI Pressure Regulator
• Irritec Permaloc Tubing Tee with Female Hose Threads
• Pipe Thread Tape
You'll need this setup to connect the water hose and feed your raised bed drip irrigation system. The filter catches any hard particles in your water and the pressure regulator ensures your water pressure isn't too high for the drip tape.
Assemble the filter, pressure regulator, and tee as shown in the diagram below, using pipe thread tape for each connection. Cut a place in the mainline along the ground and attach the mainline to both sides. Install this in a place where it will be convenient to connect your water hose.

Assembling the Mainline Header for Each Raised Bed
Parts Needed:
• Mainline Elbow
• Mainline Connector Valve
• Mainline Tee
• Mainline End Cap
To create the mainline header at the top of each bed, you'll first need to assemble the valve setup. This part isn't completely necessary, but having a shutoff valve at the top of each bed will prove to extremely valuable down the road. And it's much easier to install now than later.
Connect a mainline elbow, mainline connector valve, and a mainline tee using a couple short (approx. 2") pieces of mainline tubing. Cut the vertical mainline riser for each bed so that it is level with the soil in the beds. Install the elbow of the assembled piece on the vertical riser and tighten.
Connect a short piece of mainline tubing to each side of the tee so that it runs to almost the end of the bed. Add a mainline end cap on each end of the mainline tubing. Ensure that the end caps are tightened well so that no water escapes from the end of the mainline tubing.

Installing the Drip Tape for Each Raised Bed
Parts Needed:
• Irritec P1 Drip Tape
• Drip Tape Row Start with Valve
• Drip Tape Row End
• Hole Punch
Cut drip tape pieces to the length of the bed. The number of pieces you'll need will be determined by how many rows you intend on planting in an individual raised bed. Using the hole punch, punch a hole in the mainline tubing where you want each row to start.
Connect a drip tape row start to the tape and push the row start into the mainline tubing until you hear it pop. On the other end of the drip tape, install a drip tape row end to terminate the end of the tape. Turn on the water and ensure that no parts are leaking.
See More of Our Raised Bed Irrigation Installation
If you'd like to see more demonstrations of this setup, click on the links below to see videos from our YouTube channel.
• Installing Mainline Under Beds
• Installing Vertical Risers and Connecting Mainline Tubing
• Creating Mainline Headers and Installing Drip Tape


